Easy Crochet Tote Bag Pattern: Beginner Step-by-Step
This simple bag features a firm, smooth texture that holds its shape even when loaded with heavy books or groceries. Beginners enjoy this pattern because it relies on basic stitches while teaching how to manage tension for a uniform finish. You will find that the dense fabric prevents your keys or small items from slipping through the sides. It works as a quick weekend project for those who want a practical accessory that does not require complicated shaping. Throughout these instructions, you will learn how to maintain consistent round counts for a professional, finished look that lasts.
Why You Will Love This Pattern
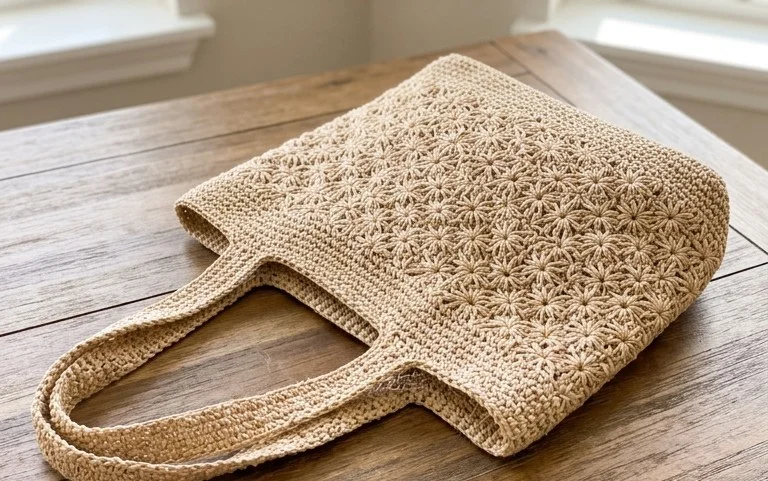
This beginner-friendly project creates a structured, functional fabric that stands up well to daily use. The stitch pattern relies on a dense, tight construction, which prevents your belongings from slipping through the gaps. Because it works up quickly in a single afternoon, it serves as an ideal choice for last-minute gifts or a refreshing palate cleanser between larger, more labor-intensive blanket projects. Its versatility allows you to use almost any leftover medium-weight yarn from your stash, making it a cost-effective way to clear out extra supplies while producing a polished, professional result.
I managed to finish this bag in just one weekend. The instructions are incredibly clear and the finished structure is much sturdier than I expected for a crochet item.
— Sarah, hobbyist maker
Pattern Overview & Skill Level
- Skill Level: Beginner
- Approximate Time: 3 to 5 hours
- Construction: Worked in joined rounds, starting from a flat circular base and continuing upward to create a seamless tube body.
- Finished Dimensions: 9 inches wide by 10 inches tall (excluding handles).
Materials & Supplies Needed
- Yarn: Worsted weight (#4), 100% cotton yarn, approximately 350 yards. Cotton provides the necessary structural integrity for a bag.
- Hook Size: 4.5 mm (US 7) to create a tight, dense fabric.
- Notions: Tapestry needle for weaving in ends, a locking stitch marker to track the start of rounds, and a measuring tape.
- Yarn Substitutions: Acrylic yarn is a soft alternative, but note that it stretches significantly more than cotton and may not hold the shape as well under heavy weight.
Stitch Guide & Abbreviations (US Terms)
- ch = chain
- st/sts = stitch/stitches
- sl st = slip stitch
- sc = single crochet
- inc = 2 sc in the same stitch
- BLO = back loop only: insert hook only under the back loop of the stitch instead of both loops.
- rnd = round
Special Stitch Notes
Joining Rounds: At the end of every round, you will sl st into the first sc of that round to close it, then ch 1 to begin the next round. The ch 1 does not count as a stitch.
Step-by-Step Pattern Instructions
Base
- Rnd 1: Start with a magic ring. Work 8 sc into the ring, sl st to first st to join. (8 sts)
- Rnd 2: Ch 1, inc in each st around, sl st to join. (16 sts)
- Rnd 3: Ch 1, (sc in next st, inc in next st) repeat 8 times, sl st to join. (24 sts)
- Rnd 4: Ch 1, (sc in next 2 sts, inc in next st) repeat 8 times, sl st to join. (32 sts)
- Rnd 5: Ch 1, (sc in next 3 sts, inc in next st) repeat 8 times, sl st to join. (40 sts)
- Rnd 6: Ch 1, (sc in next 4 sts, inc in next st) repeat 8 times, sl st to join. (48 sts)
Body
- Rnd 7: Ch 1, work in BLO, sc in each st around, sl st to join. (48 sts)
- Rnds 8–30: Ch 1, sc in both loops of every st around, sl st to join. (48 sts)
Handles
- Rnd 31: Ch 1, sc in next 8 sts, ch 20, skip 8 sts, sc in next 16 sts, ch 20, skip 8 sts, sc in last 8 sts, sl st to join. (48 sts plus 40 chs)
- Rnd 32: Ch 1, sc in each sc and each ch around, sl st to join. (88 sts)
- Rnds 33–34: Ch 1, sc in each st around, sl st to join. Fasten off and weave in all loose ends. (88 sts)
Care & Washing Instructions
- Hand wash in cool water using a mild detergent to maintain the shape of the cotton fibers.
- Lay the bag flat on a clean towel to air dry, reshaping it with your hands while damp.
- Avoid using a tumble dryer, as high heat can shrink cotton and distort the stitch definition.
Pro Tips & Common Mistakes to Avoid
- Maintain consistent tension throughout the body of the bag. If your stitches become loose, the bag will sag when items are placed inside.
- Place a stitch marker in the first stitch of every round. This helps you keep track of the start of the round, preventing accidental increases or decreases.
- Weave in your yarn tails by running the needle through the back loops of the interior stitches for at least two inches to ensure they stay secure.
- You can adjust the height of the bag by adding or subtracting rounds during the body phase, but keep in mind that adding significant length will require additional yardage beyond the stated 350 yards.
Frequently Asked Questions
Can I use a larger hook size for this project?
Using a larger hook will result in a looser, more open fabric. For a bag, this is generally discouraged as it allows contents to fall out. Stick to the recommended hook size or smaller for a durable finish.
Is this pattern suitable for complete beginners?
Yes, the pattern only requires basic knowledge of single crochet and increases. If you are comfortable working in joined rounds, you will find the process straightforward.
How do I adjust the size of the base?
To make a larger base, continue the increase pattern of (sc in next X sts, inc in next st) for additional rounds before moving on to the body section. Remember that increasing the base diameter will require more yarn overall.
Am I allowed to sell bags made from this pattern?
You are welcome to sell finished items made from this pattern, provided you credit the original design. Mass production is not permitted.
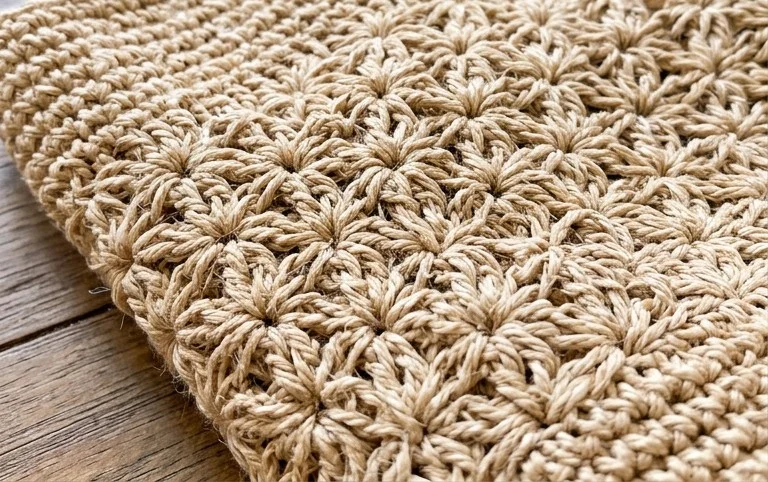
Seeing your finished bag hanging on your shoulder for the first time is a satisfying reward for your hard work. You can change the aesthetic by adding a pop of color with a striped base or by sewing a cotton lining inside for extra durability. Tag your completed photos on social media so others can see your unique color choices. If you want more patterns for your home or wardrobe, browse the rest of the project archives on the blog for additional inspiration.